
Dashboard
Below, a screen capture of CMS on the “Pages” category
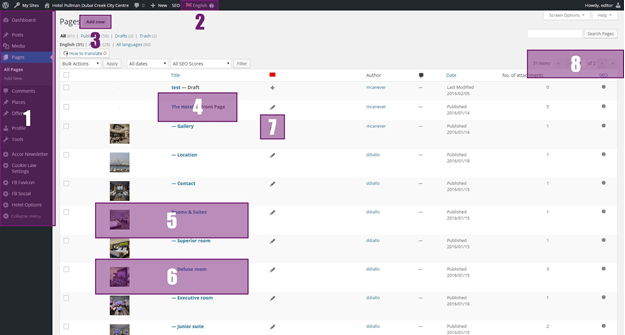
1 – Main navigation / 2 – Language switch / 3 – Action button / 4 – Website main page / 5 – Parent page / 6 – Child page / 7 – Create/Edit translation content / 8 – Page navigation
2. Language switch
Here, you can switch to another language to see the related content.
3. Action button
This button allows you to create a new page / places / offers depending on the category you are in.
4. Website main page
On the “Page” category, the website main page is marked with the suffix “Front page”.
5. Parent page
Here, this is a parent page.
6. Child page
Here, this is a child page (in this screenshot, the parent page is the “Rooms & Suites” page).
7. Create/Edit translation content
Here, you can create or edit the translation of the related page.
Page in edit mode
Below, a screen capture of CMS on a page in the edit mode (page, place, offer …)
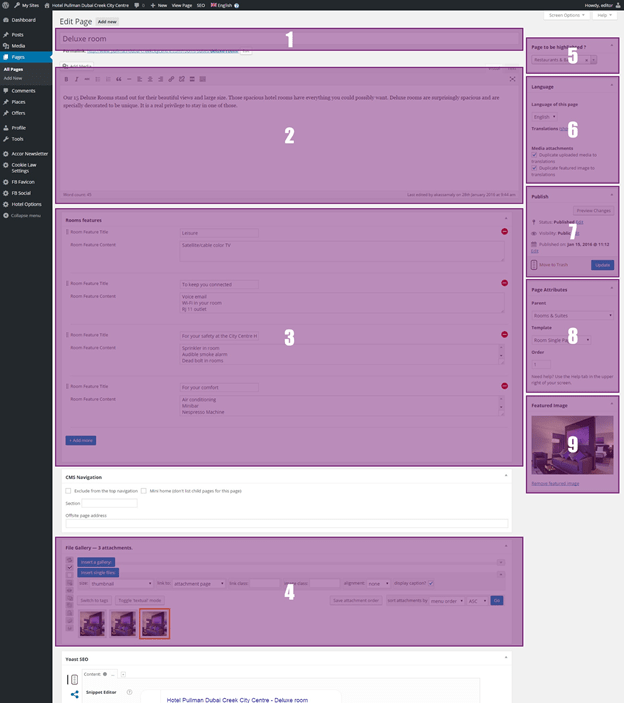
1 – Title / 2 – Main text / 3 – Additional content / 4 – File gallery / 5 – Page options / 6 – Language / 7 – Publish / 8 – Page attribut / 9 – Featured image
1. Title
In this field, you can edit the title of the page/place/offer …
2. Main text
In this field, you can edit the main text of the page/place/offer …
3. Additional content *
In this section, you can add and edit the additional contents of a page (specific according to the selected template).
4. File gallery
In this section, you can upload images for the slideshow (only on the homepage).
5. Page options *
In this section, you can add options on the page/offer (specific according to the selected template ).
6. Language
In this section, you can choose the language of the item and select if you want duplicate uploaded medias and featured image to translations.
7. Publish
This section allows you to manage the publication of your page (publish, edit, delete).
You can also preview your changes by clicking on the “Preview changes” button.
8. Page attribute
In this section, you can select the parent page and the template page.
9. Featured image
In this section, you can select the image/illustration on the page/offer.
* to see these sections, you need select a template and save before.
The text editor
Below, a screen capture of the text editor:
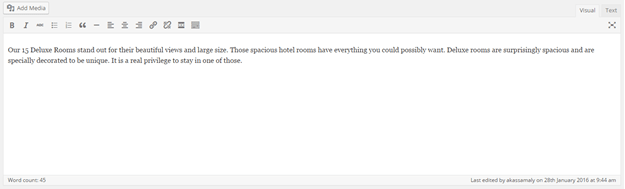
As on Word, the text editor allows you to format the content. You can bold or italicize your text with the editor.
You can also create a link:- Select the text you want to link
- Click on the chain icon (Insert/edit link)
- Click on the small icon
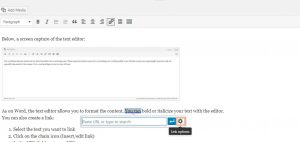
- In the URL field, put your URL
- Check the box to open the link in a new tab
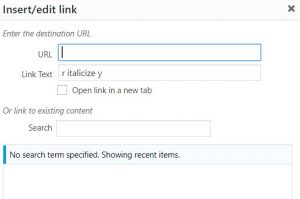
- Click on “Add Link” button to create your link
If you are familiar with HTML, you can create/edit the text directly in HTML. For this, just click on the “Text” tab to switch to HTML mode.